Why spend a few hundred dollars for someone else to fix a hole in your wall, when you can fix it yourself in less than an hour for around $20-$30. This is what you will need to buy:
1. 5 minute “quick set” (around $8)
2. Primer and Paint (around $5-$15 for a pint of paint as well as for the primer... however you might be able to get away without using the primer, just make sure to bring a piece of the broken wall to the hardware store to get a perfect color match)
3. Optional: texture spray (only needed if there is some sort of texture on your wall, instead of being completely flat and smooth)
These are the items that you should already have:
1. Piece of dry wall/sheet rock that approximately fits the hole (if you’re unable to re-use some laying around, you might be able to get creative and use a piece of wood or something similar to that effect since you just need something sturdy enough to apply the quick set over and paint over… worst case scenario a 4’x8’ standard piece of dry wall costs between $8-$12 and you might get lucky if you ask an employee at a hardware store if there are any broken pieces laying around the back)
2. Sheet rock knife (or any long blade)
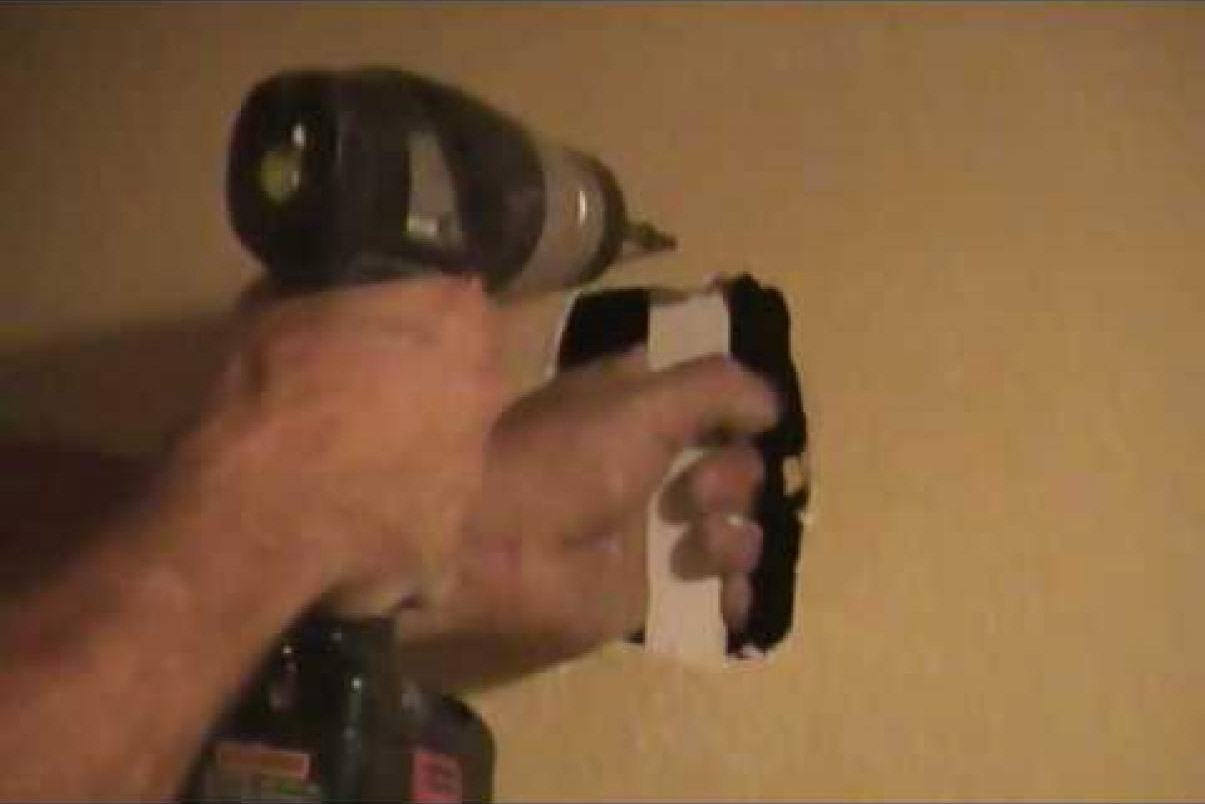
3. Screw-driver (a battery powered one is preferred, but a hand-held one may be used too)
4. Screws
5. Flat trowel (or anything that has a wide flat edge)
6. Fine sand-paper
7. Piece of wood to be used for a backing
8. Any container deep enough to mix the “quick set” in
9. Water
10. Anything that can be used to mix the “quick set” with water and spread it across the wall, like a butter knife for example
11. Paint brush (or even a rag or sponge)
Step 1 is to clean up the hole by removing any broken pieces that are around it (it doesn’t have to be made into a perfect square). Use your hand first and then a sheet rock knife around the edges of the hole.
Step 2 is to cut piece of sheet rock to approximately fit the shape of the hole
Step 3 is to use a small piece of wood as a backing for the new piece of sheet rock to rest against. Depending on the size of the hole, just use one piece of wood in the center of the hole behind the wall, or use two pieces of wood spaced evenly from each other to provide better support. Then just screw above and below the hole in the wall to attach the backing, and then place the new piece of sheet rock into the hole and apply the third screw to secure it to the backing.
Step 4 is to mix the 5 minute “quick set” with water in any empty container, apply it over the hole, and then use the flat trowel to smooth it across the wall.
Step 5 is to wait around 5 minutes for it to dry, and then sand it down, focusing on smoothing the edges around the area where you applied the “quick set.”
Step 6 is to optionally apply the spray texture and wait for it to dry. Then apply the primer if needed, let it dry, and then use the paint. Once it’s dry you’re completely finished!
Please click here to watch this video for additional aid, since it’s one of the rare videos that will actually provide you with honest information that isn’t trying to get you to wastefully spend your money.
Wisdom-Square › Home Improvements › How to Fix a Hole in the Wall